Contents
how one can repair ubuntu machine again gui and command line
Systemback is a loose application that can be utilized to backup and repair Ubuntu-like methods. It’s relatively very similar to MS Home windows’s “Gadget repair” possibility. The use of Systemback, we will be able to simply create backup of a Ubuntu desktop or server machine, and repair them to the former state on every occasion we would like. It creates a number of repair issues date and time-wise, and shows the latest repair issues on the most sensible. Now not handiest repair issues, we will be able to additionally create all the backup of your reside machine together with consumer configuration information and knowledge as ISO, and save them in an exterior exhausting disk.
In a nutshell, the usage of Systemback, we will be able to,
- Backup the machine without or with consumer configuration information and knowledge;
- Repair machine to any earlier operating state;
- Reproduction information/folders from one partition to every other;
- Create the reside Ubuntu machine as ISO, and boot your machine the usage of it in-case of any issues;
- Improve our machine to subsequent to be had model and so forth.
On this instructional, allow us to see how one can set up and use Systemback application in Ubuntu 16.04 LTS desktop and server editions.
Set up Systemback in Ubuntu
I’ve examined this application in Ubuntu 16.04 LTS desktop and server editions. On the other hand, It’ll paintings on earlier Ubuntu variations similar to Ubuntu 15.10, 15.04, and 14.04 LTS variations, and different Ubuntu derivatives like Linux Mint, Fundamental and so forth.
First, upload Systemback PPA the usage of command:
sudo add-apt-repository ppa:nemh/systemback
Replace the device assets the usage of command:
sudo apt-get replace
In the end, set up Systemback the usage of command:
sudo apt-get set up systemback
Systemback Utilization in Ubuntu desktop
As soon as put in, Release Systemback both from Menu or Cohesion launcher.
The default interface will have to seem like underneath.
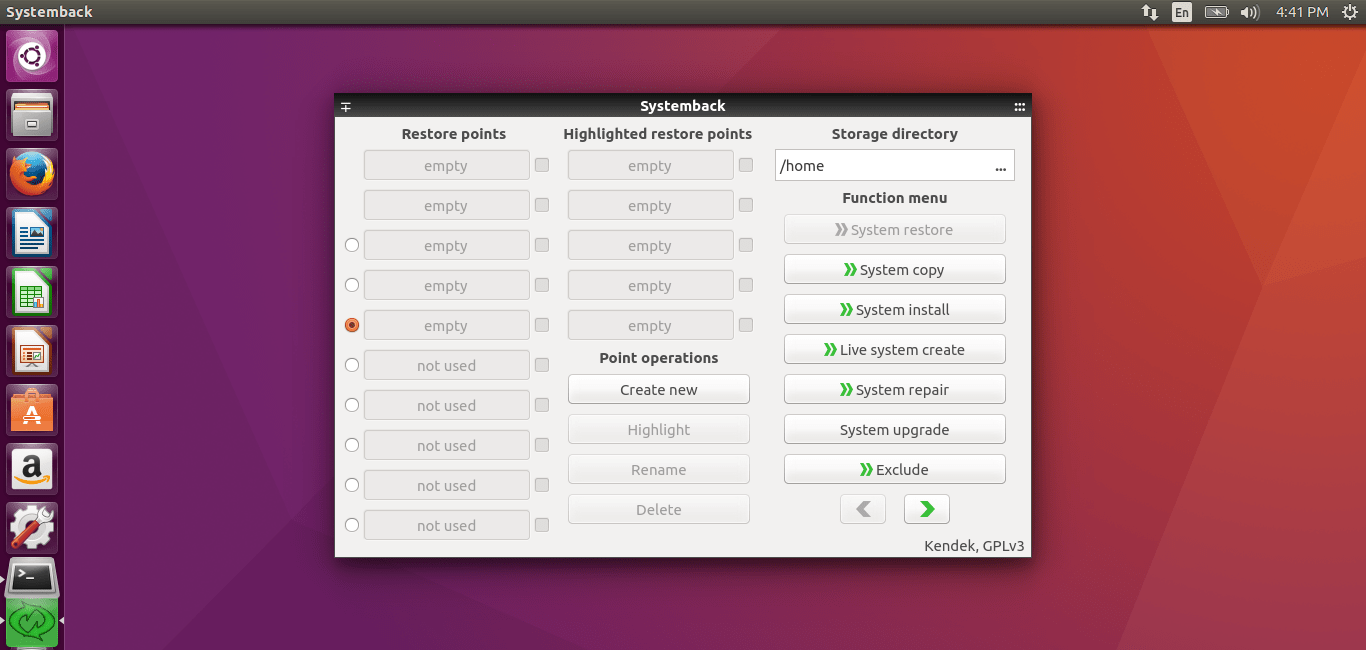
As you spot within the above screenshot, there are 5 sections specifically,
- Restored issues – Listing of to be had repair issues
- Extremely repair issues
- Level operations – Create, hightlight, rename or delete repair issues
- Garage listing – The positioning of stored repair issues
- Serve as menu – This menu comprises the principle choices similar to Gadget reproduction, repair, set up, reside machine create, machine restore, machine improve, exclude, come with, Time table, and Settings and so forth.
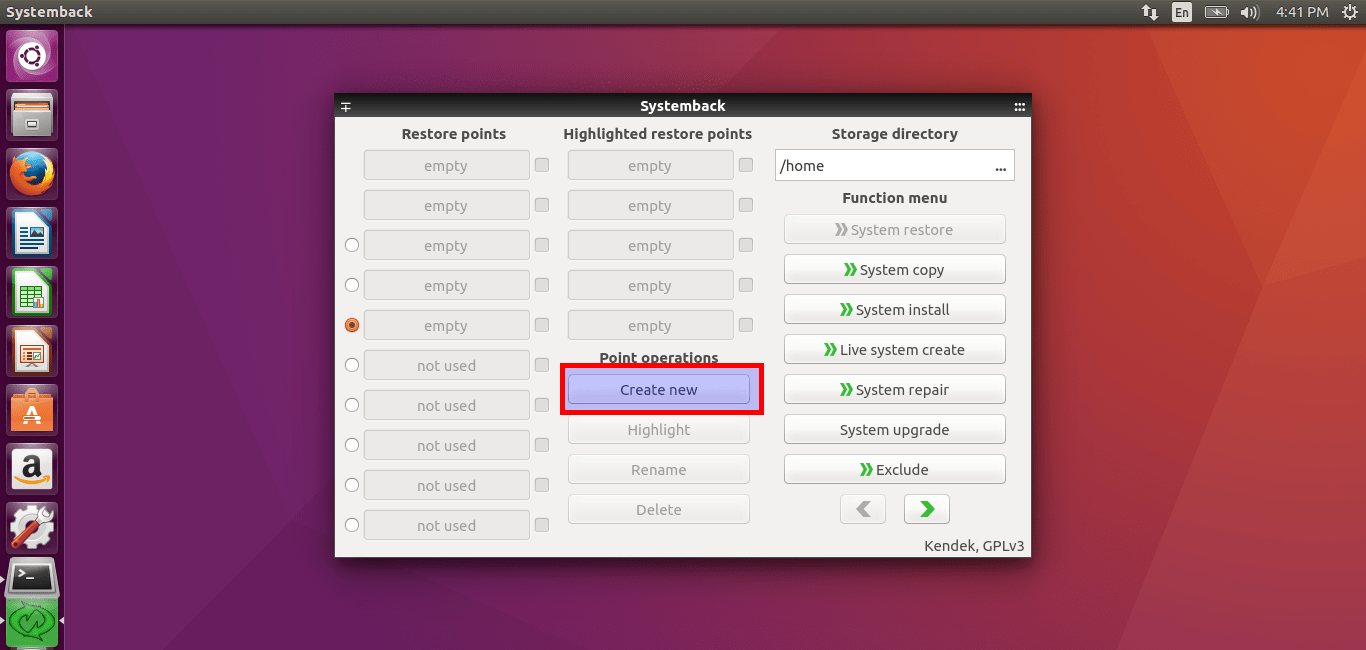
Developing machine repair issues
In the beginning release, there’s no repair issues. So, allow us to create our first repair level. You’ll create any choice of repair issues both manually or mechanically.
To take action, click on Create New button underneath Level operations segment.
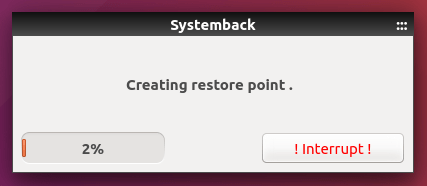
Now, Systemback will begin to create the primary repair level.
As soon as repair level advent finished, It’ll be displayed in the principle interface underneath Repair issues sections.
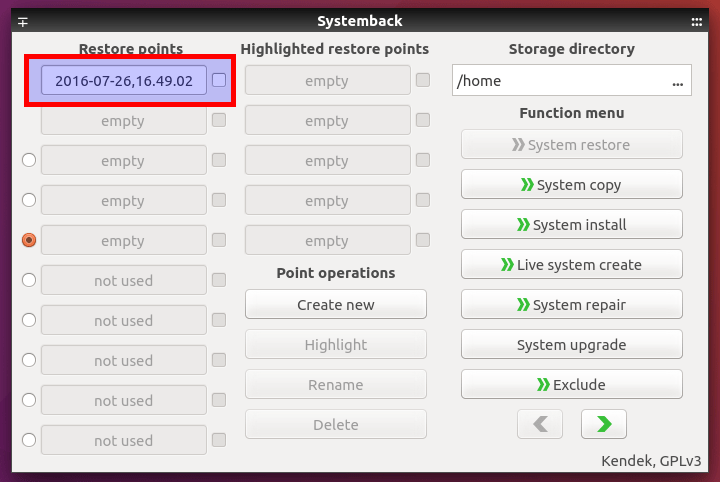
The newly created repair issues might be saved underneath /house listing by way of default. You’ll exchange this location from Garage listing segment. Be sure you have sufficient loose house within the garage listing (i.e /house listing).
Gadget repair
To revive your Ubuntu machine, choose the repair level of your selection and click on Gadget repair possibility discovered underneath Serve as menu.
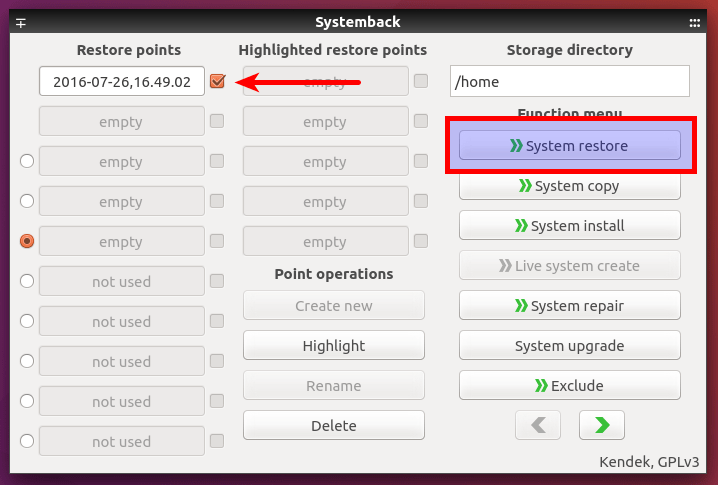
Within the subsequent window, choose whether or not you need to do complete machine repair or simply the Gadget information repair. Additionally, you’ll select whether or not you need to revive consumer(s) configuration information.
I sought after to to do complete repair, so I decided on the primary possibility.
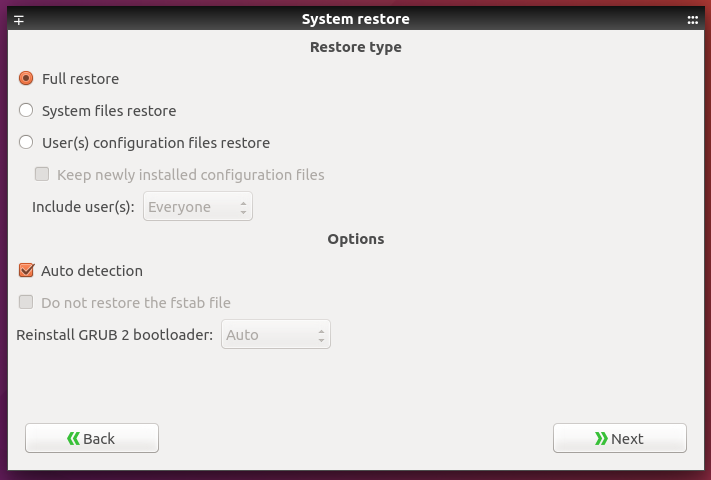
In the end, click on Get started.
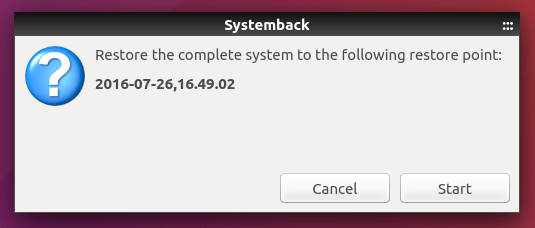
That’s it. Your machine might be restored to the chosen repair level.
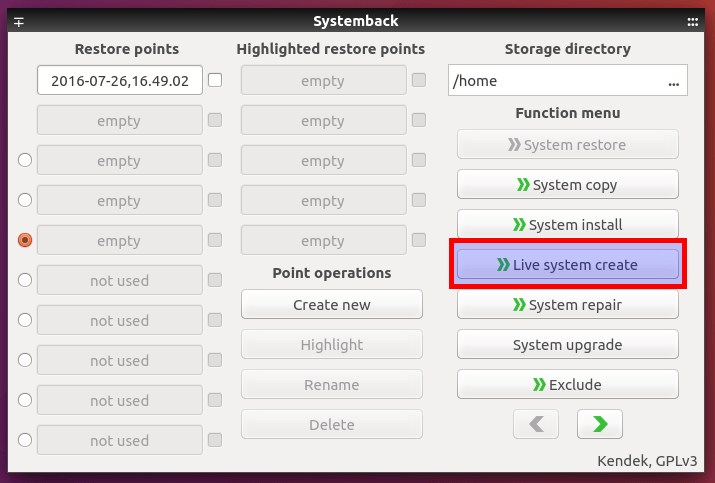
Create reside machine as ISO
That is every other helpful possibility. You’ll create all the the machine as reside bootable ISO and write the ISO to DVD or USB power.
Click on Reside machine create button.
Make a choice the positioning the place you need to retailer the ISO record. In the end, click on Create New button.
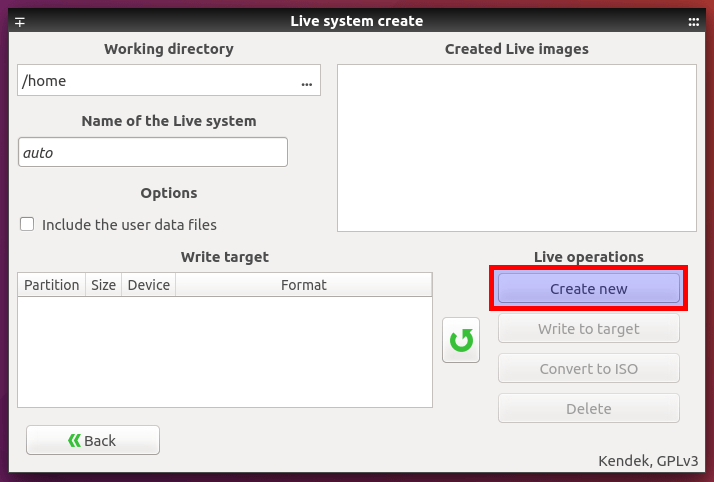
Additionally, you’ll come with the consumer information information within the ISO by way of settling on the checkbox that reads Come with the consumer information information.
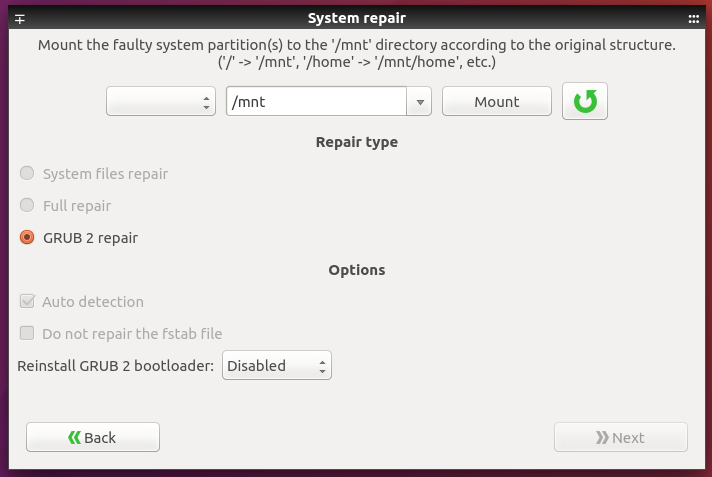
Gadget restore
This selection lets you repair any mistakes within the GRUB and fstab information.
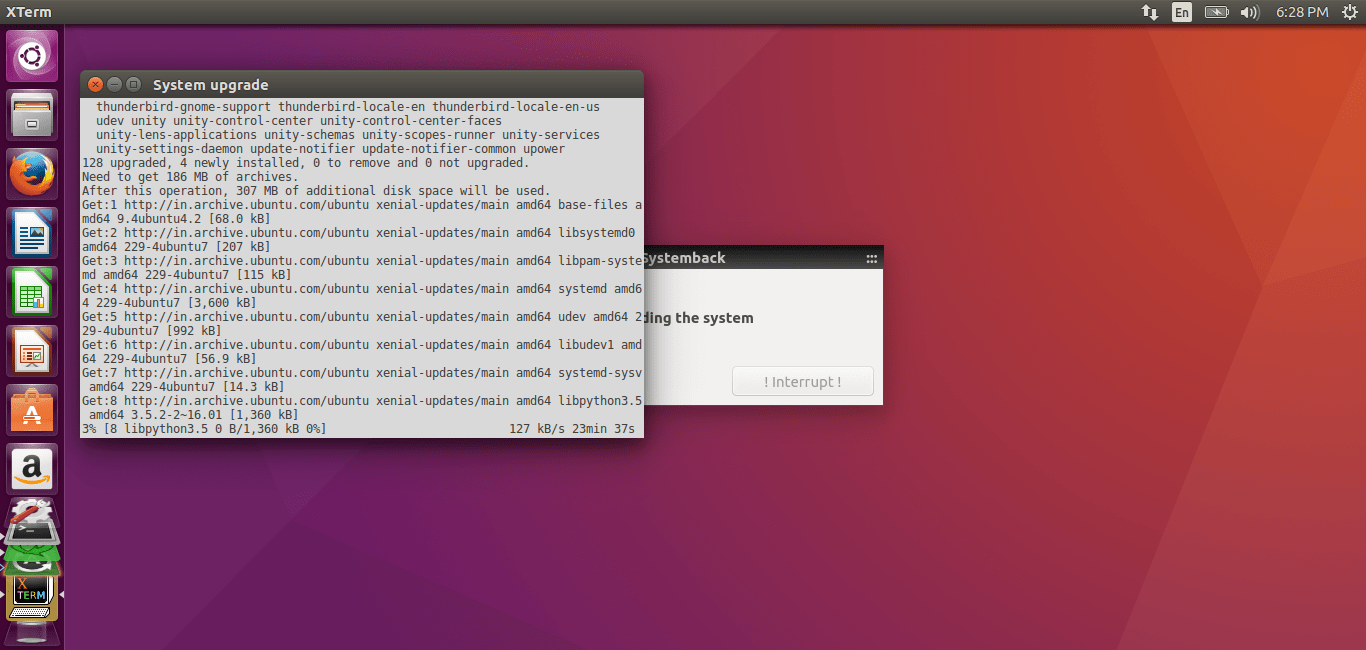
Gadget improve
Need to improve your Ubuntu machine to the latest model? That’s additionally conceivable. Simply click on at the Gadget improve possibility.
Systemback will improve your machine mechanically.
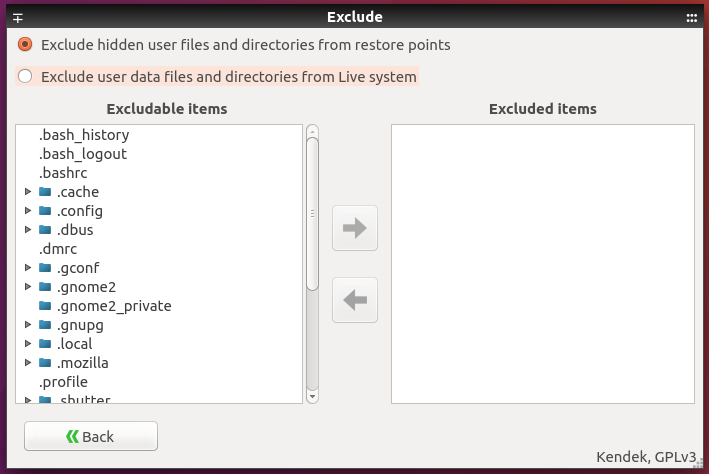
Exclude
The use of this segment, you’ll exclude some information and folders from repair issues.
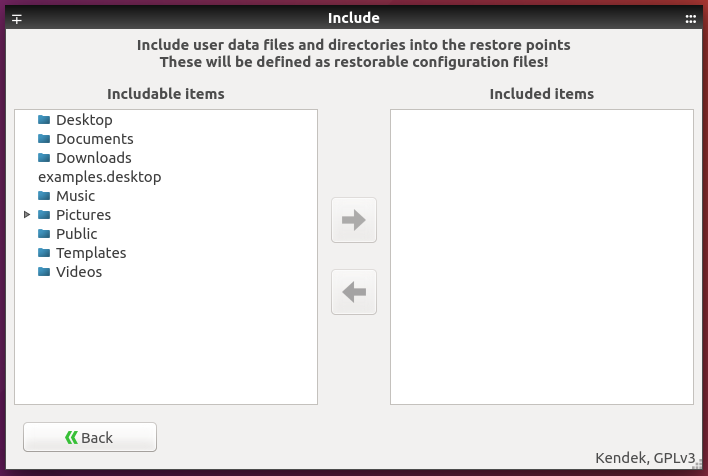
Come with
This selection lets in us to incorporate the information and folders in repair issues.
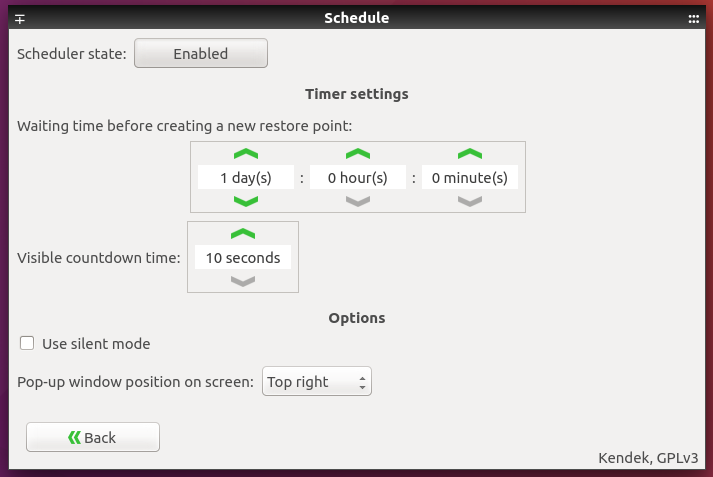
Time table
This every other essential and helpful possibility. We will be able to create repair issues at common period.
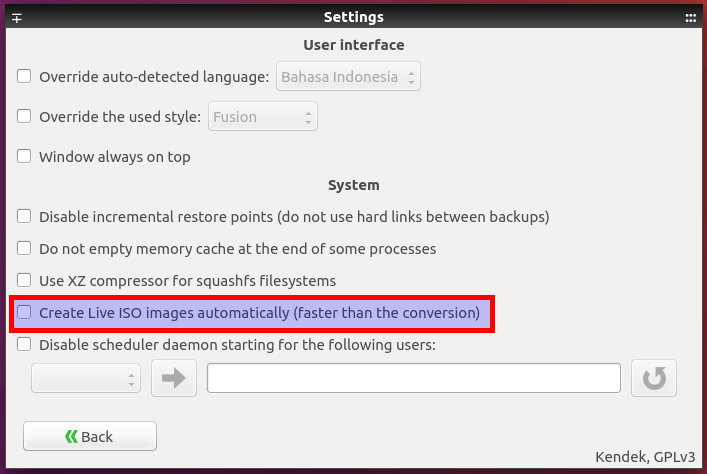
Settings
The settings possibility has different settings similar to override auto-detected language, disable incremental repair issues, create reside ISO photographs mechanically, disable scheduler daemon for explicit customers, permit compress for squashfs filesystems and so forth.
Gadget again backup has a variety of helpful choices. Simply undergo each and every segment and select the choices of your selection.
Gadget again Utilization in Ubuntu server
Gadget again isn’t just for Desktops, but in addition works rather well in Ubuntu Servers too. The machine again doesn’t desire a GUI desktop setting. You’ll use it each in GUI and CLI environments.
To release Systmback in CLI mode (i.e Servers with out Graphical desktop), run the next command:
sudo systemback-cli
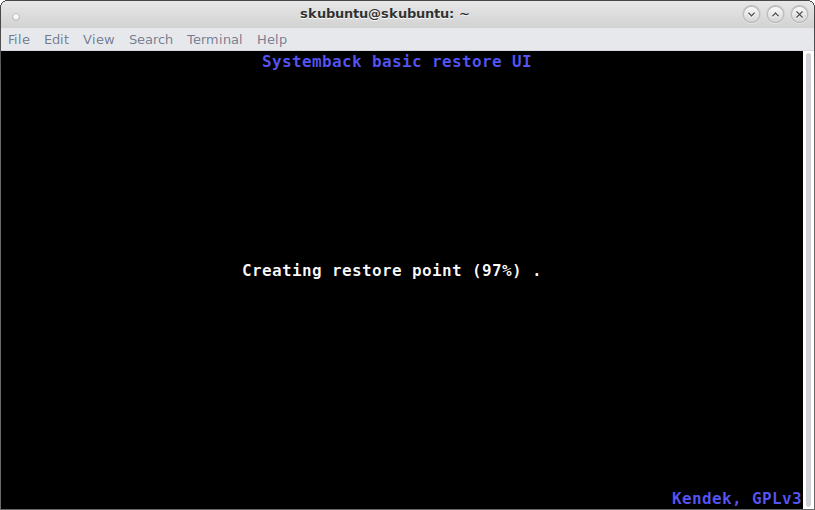
You are going to see the next display screen.
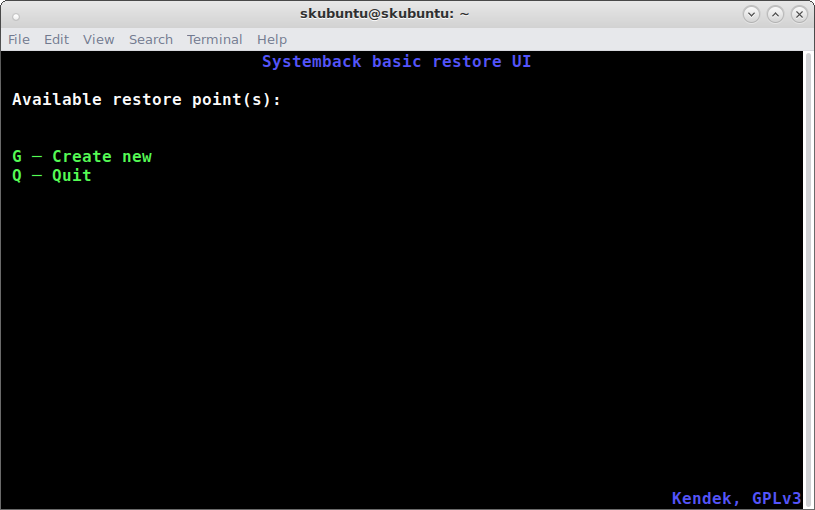
Since it’s the first time, there aren’t any to be had repair issues. So, allow us to create a brand new repair level.
To take action, sort “g”.
Now, Gadget again application will create the repair level of your Ubuntu server.
As soon as the repair level created, Gadget again application will show it in the principle window underneath the To be had repair level(s) segment.
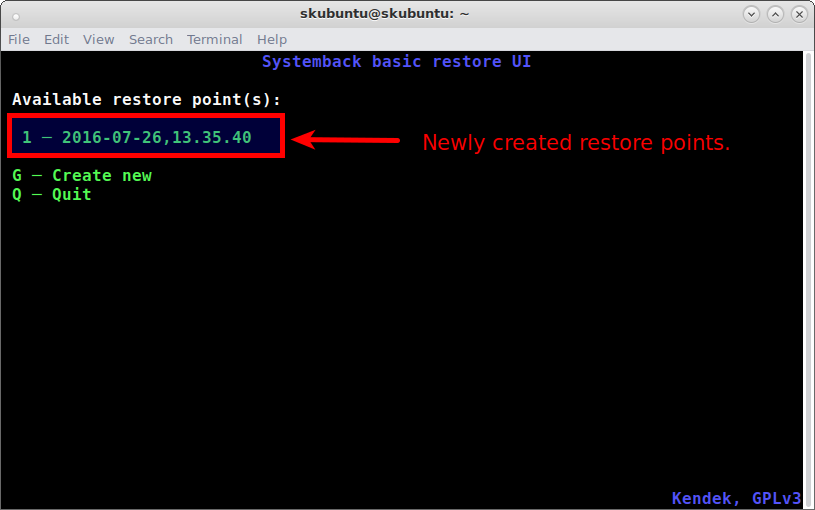
As you spot within the above screenshot, I’ve created just one Repair level ( 1 ─ 2016-07-26,13.35.40 )
of my Ubuntu server. The second one repair level title might be 2-2016-xx-xx-xx.
To revive the Ubuntu server to its earlier state, simply choose the repair level quantity (i.e 1 in our case).
Within the subsequent display screen, you are going to see the next 3 choices.
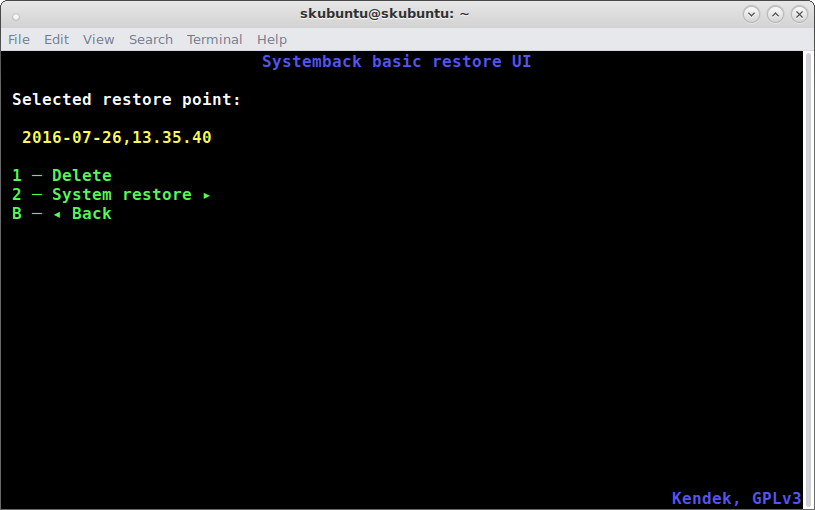
To delete the repair level, sort “1”. To revive the machine, sort “2”. To return to the former display screen, sort “three”.
Allow us to repair the machine. To take action, input the quantity “2”.
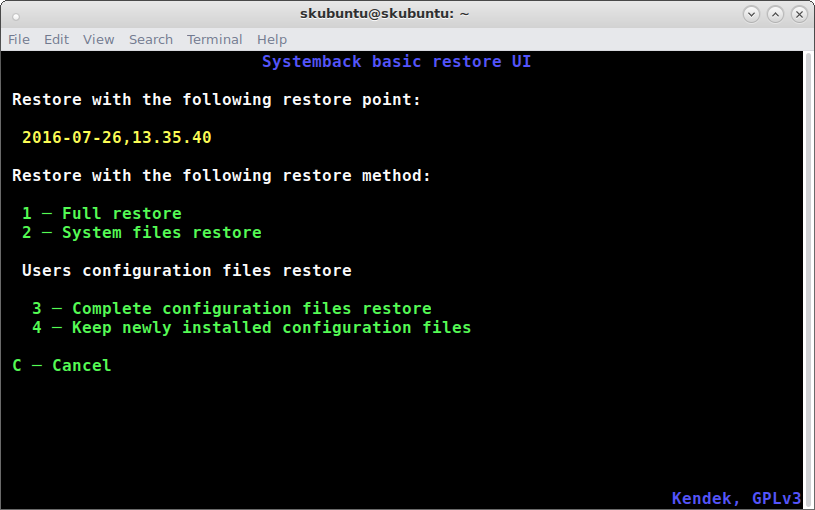
Within the subsequent window, you’ll choose the to be had repair means. There are two strategies:
- Complete repair
- Gadget information repair
Additionally, you’ll choose whether or not the consumer configuration information will have to be restored or no longer.
I wish to do “complete machine repair”, so I entered the quantity “1”.
Subsequent, you want to make a choice whether or not you need to stay the present fstab record and whether or not you need to reinstall the Grub bootloader record or no longer.
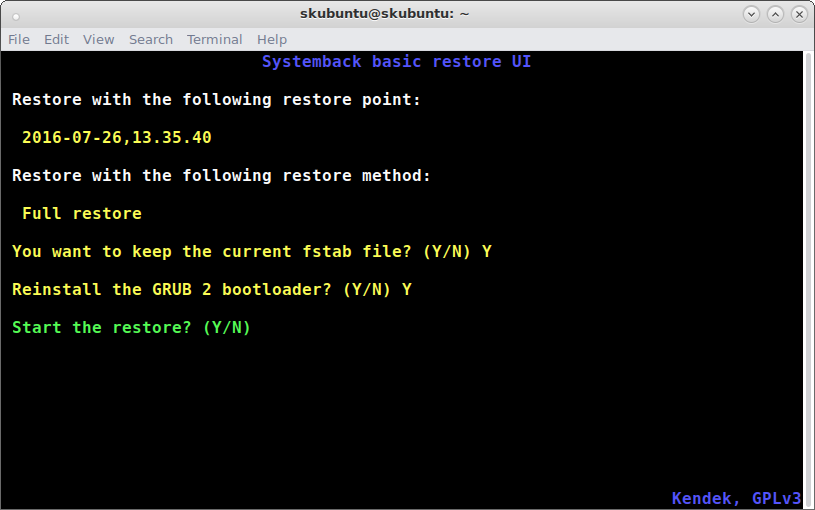
In the end, press “Y” to start out the “Complete Repair”.
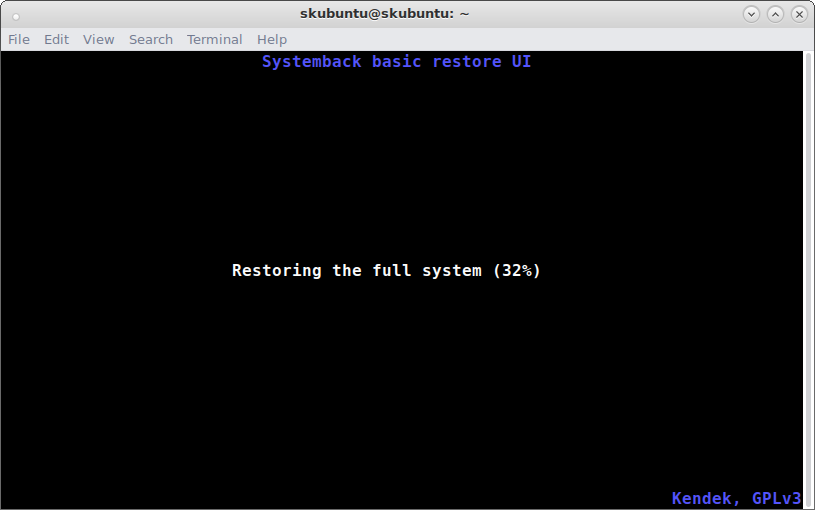
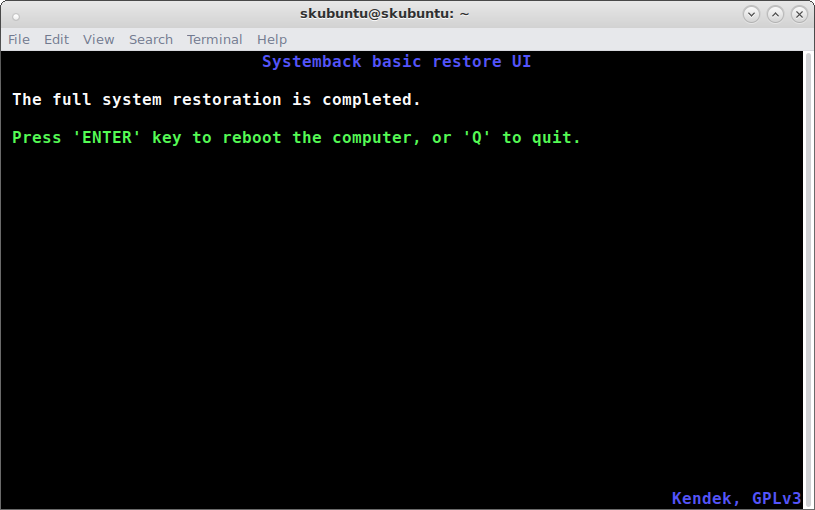
That’s it. Now, Your Ubuntu server might be restored to the former state.
After the total machine recovery is done, Press ‘ENTER’ key to reboot the pc, or ‘Q’ to hand over.
As I discussed already, the repair issues might be to be had within the /house listing. Reproduction them to a USB exterior power and stay them in a protected location. You’ll use them to revive your Ubuntu machine if one thing went unsuitable

Comments 1