Fix Windows 11 Restarting Automatically
- Press Windows and X key all together.
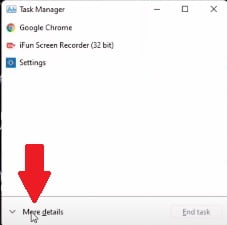
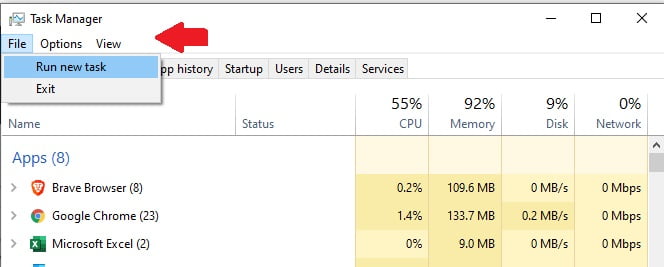
Flow below Step.
- so what you have to do is just have to select this pc
- you have to navigate to just have to select this pc and local c drive
- from there we have to select windows folder
- and from there we have to select system32
- After you have to select a file named cmd
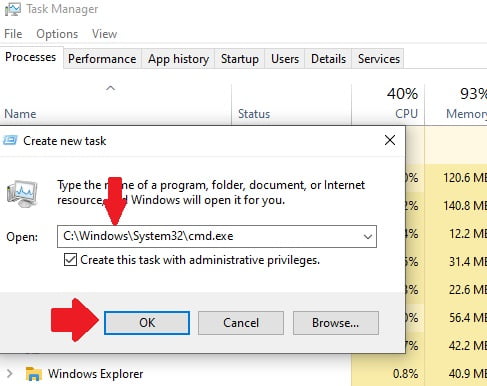
- you have to click open and now you’ll be getting an option like the c windows system32
C:\Windows\System32\cmd.exe
- Now you have to tick create this task with administrative privileges
- Click ok windows command will open
I give you few commands so on the cmd so the first one is you have to type on the cmd which is
gpuupdate
- Now you just have to press enter this will take a little bit time you just have to wait for it. After that you just have to type cls which means you just have to close it.
- Now you have to give one more command which is very important.
chkdsk c /f /r
Solution Number 2: Fix Auto Restart Problems In Windows 11
Next instructions what you have to follow.
- click on search and the next is you have to type regedit you have to click over there run as administrator and go for yes.
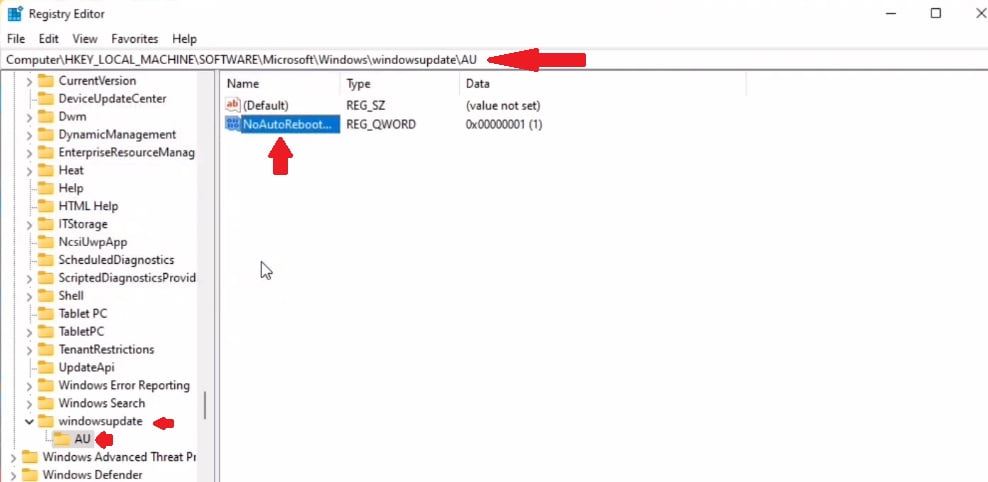
- And Open REGEDIT-HKEYLOCALMACHINE\SOFTWARE\MICROSOFT\WINDOWS
- Create a new key and name it WINDOWS UPDATE– Create one more key and name it AU-Select it and navigate to QW64 (According to your pc) select either Q32 If it is 32 bit or Q64 If it is 64 bit. No add name as follows NoAutoRebootWithLoggedOnUser and change 1 and value to 1 from 0.
How to Fix Auto Restart Problems In Windows 11 in Deatials.
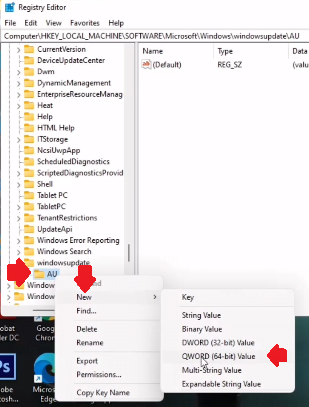
NoAutoRebootWithLoggedOnUser
