Snipe it installation
Snipe-IT was made for IT asset management, to enable IT departments to track who has which laptop, when it was purchased, which software licenses and accessories are available. so today I will show you the full installation of snipe it.
First, install xampp
Start Apache and MySql
Download Composer and Install click next, next and snipe-it-installation
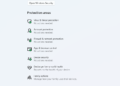
Go to localhost/phpmyadmin
Create Database and set user name and password (if you changed root password you can also change root password in C:\xampp\phpMyAdmin\config.inc.php

Extract in C:\xampp\htdocs Folder
Open Snipe IT Folder and Edit .env.tests file (use Notepad++ for editing )

Save file in .env file name
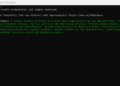
Open snipe-it folder and
Press shift+right click open command
C:\xampp\htdocs\snipe-it>
composer install --no-dev --prefer-source
 php artisan key:generate
C:\xampp\apache\conf
open httpd.conf

Open Browser and type localhost/snipe-it and snipe-it-installation

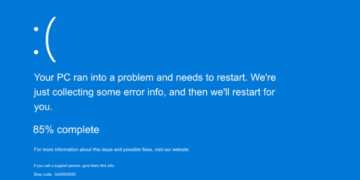
You will likely get an error:
Don’t panic, just refresh the page by hitting F5
Click on Next: Create User
Finalize everything to your liking, click F5 if you get the error again.
- Quick Fix WDF VIOLATION Blue Screen Error on Windows 10
- DPC Watchdog Violation Windows 10
Option 2: Installing Snipe-IT Asset Management on XAMPP involves several steps. Here’s a simplified guide to help you through the process:
1. Install XAMPP:
Download and install XAMPP from the official website: https://www.apachefriends.org/index.html
Follow the installation instructions for your operating system.
2. Download Snipe-IT:
Visit the Snipe-IT GitHub repository: https://github.com/snipe/snipe-it
Click on the green “Code” button and select “Download ZIP” to download the latest release.
3. Extract Snipe-IT:
Navigate to the folder where XAMPP is installed. Inside the “htdocs” folder, create a new folder (e.g., “snipeit”) and extract the contents of the downloaded ZIP file into this folder.
4. Configure MySQL:
- Open a web browser and go to
http://localhost/phpmyadmin. - Create a new database for Snipe-IT (e.g., “snipeit_db”).
- Create a new user and grant them full privileges on the new database.
- Make a note of the database name, username, and password as you’ll need them during installation.
5. Configure Environment Variables:
Navigate to the Snipe-IT installation folder (htdocs/snipeit) and find the .env.example file. Duplicate it and rename the duplicate to .env.
Open the .env file in a text editor and set the following variables:
APP_URL=http://localhost

DB_CONNECTION=mysql

DB_HOST=127.0.0.1

DB_PORT=3306

DB_DATABASE=snipeit_db

DB_USERNAME=your_db_username

DB_PASSWORD=your_db_password
Replace your_db_username and your_db_password with the database username and password you created earlier.
6. Install Composer:
Download and install Composer if you haven’t already: https://getcomposer.org/download/
7. Install Dependencies:
Open a terminal or command prompt, navigate to the Snipe-IT installation folder (htdocs/snipeit), and run the following commands:
composer install

php artisan key:generate
8. Run Migration and Seed:
Run the migration and seed commands to set up the database tables and seed initial data:
php artisan migrate --seed
9. Set Permissions:
Make sure the storage and bootstrap cache folders have proper write permissions:
chmod -R 775 storage bootstrap/cache
10. Access Snipe-IT:
Open a web browser and navigate to http://localhost/snipeit/public. The Snipe-IT setup wizard should appear. Follow the on-screen instructions to complete the setup, including creating an admin user.
11. Configure Virtual Host (Optional):
For a cleaner URL, you can set up a virtual host. Here’s a basic example for Apache:
- Open the
httpd-vhosts.conffile located inxampp/apache/conf/extra/. - Add the following lines:
<VirtualHost *:80>

DocumentRoot "C:/xampp/htdocs/snipeit/public"

ServerName snipeit.local

</VirtualHost>
- Save the file and restart Apache.
Now you can access Snipe-IT by navigating to http://snipeit.local in your web browser.
Please note that this is a simplified guide. Depending on your environment and requirements, there might be additional steps or configurations needed. Always refer to the official Snipe-IT documentation and XAMPP documentation for any specific issues or advanced configurations.
